- 翰林提供学术活动、国际课程、科研项目一站式留学背景提升服务!
- 400 888 0080
CIE A Level Physics复习笔记1.2.3 Measurement Techniques
Measurement Techniques
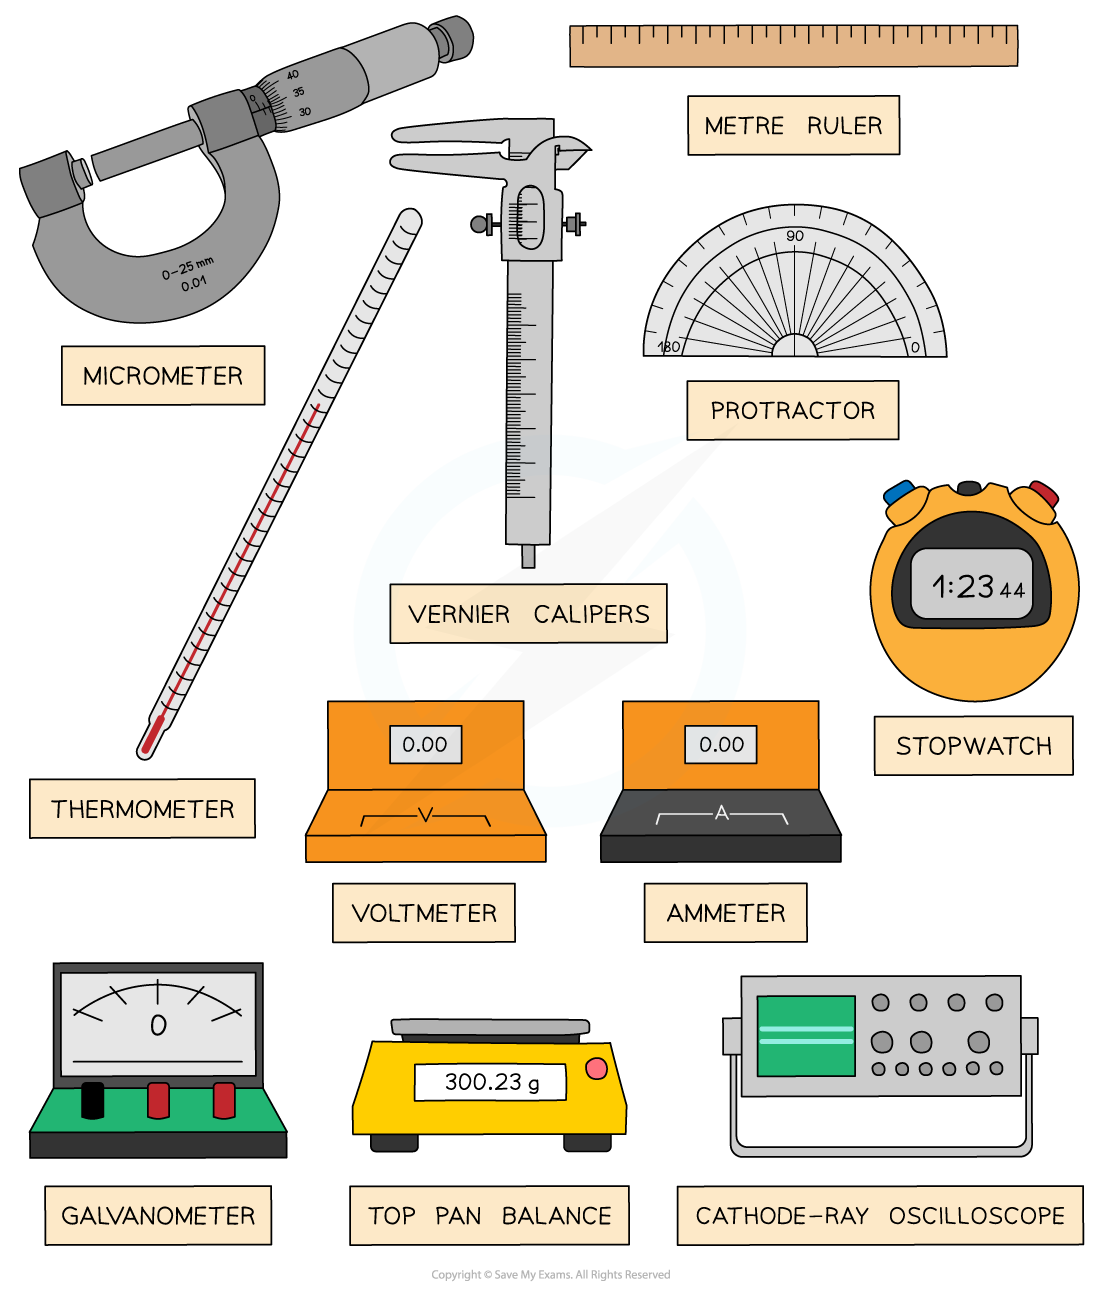
- Common instruments used in Physics are:
- Metre rules - to measure distance and length
- Balances - to measure mass
- Protractors - to measure angles
- Stopwatches - to measure time
- Ammeters - to measure current
- Voltmeters - to measure potential difference
- More complicated instruments such as the micrometer screw gauge and Vernier calipers can be used to more accurately measure length

- When using measuring instruments like these you need to ensure that you are fully aware of what each division on a scale represents
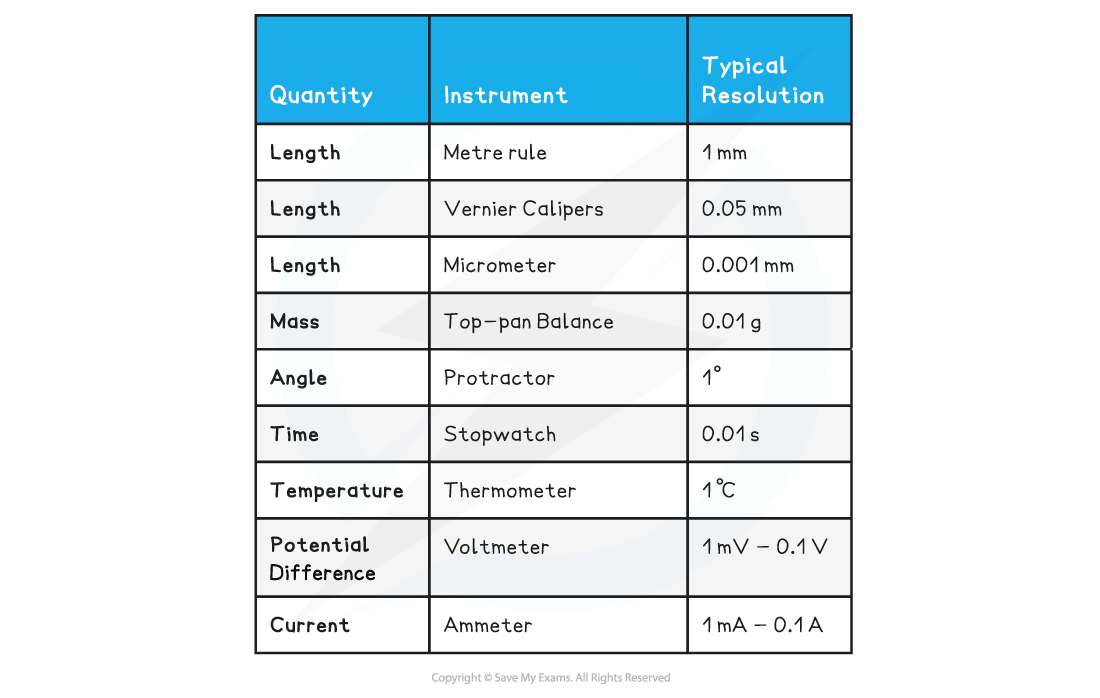
- This is known as the resolution
- The resolution is the smallest change in the physical quantity being measured that results in a change in the reading given by the measuring instrument
- The smaller the change that can be measured by the instrument, the greater the degree of resolution
- For example, a standard mercury thermometer has a resolution of 1°C whereas a typical digital thermometer will have a resolution of 0.1°C
- The digital thermometer has a higher resolution than the mercury thermometer
Measuring Instruments Table

Micrometer Screw Gauge
- A micrometer, or a micrometer screw gauge, is a tool used for measuring small widths, thicknesses or diameters
- For example, the diameter of a copper wire
- It has a resolution of 0.01 mm
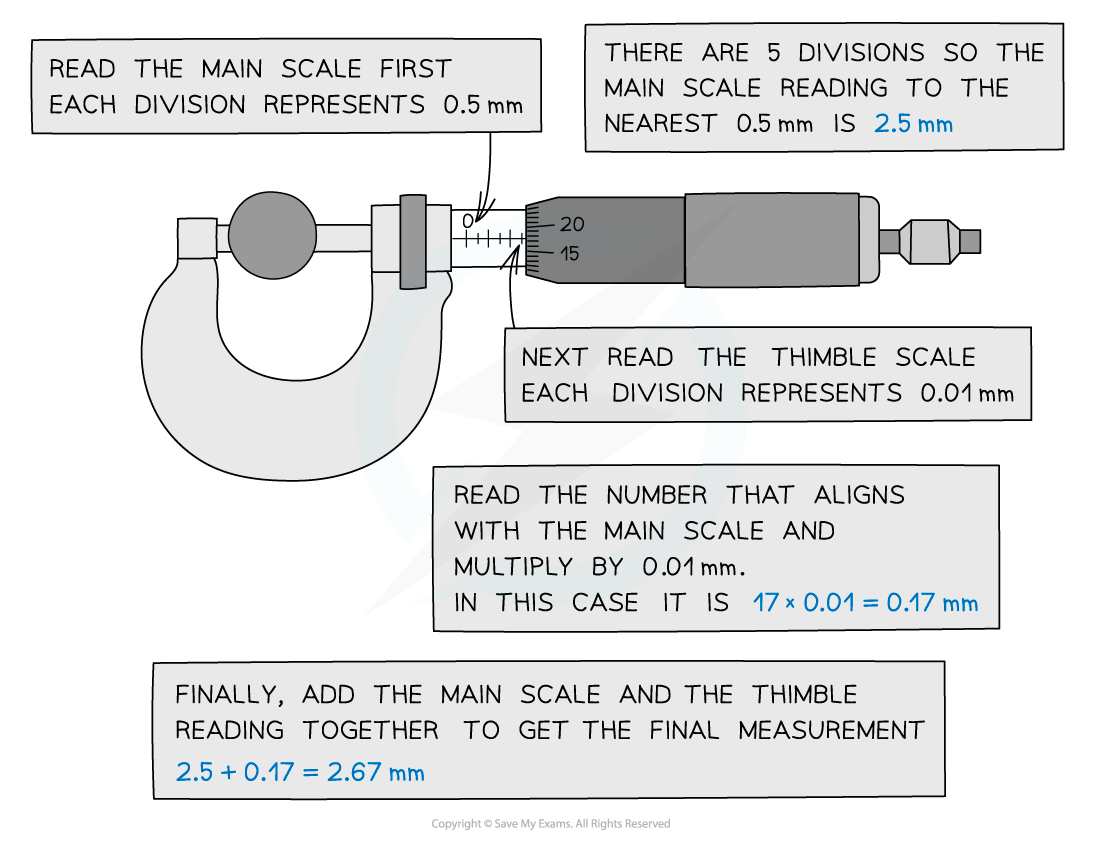
- The micrometer is made up of two scales:
- The main scale - this is on the sleeve (sometimes called the barrel)
- The thimble scale - this is a rotating scale on the thimble
- The spindle and anvil are closed around the object being measured by rotating the ratchet
- This should be tight enough so the object does not fall out but not so tight that is deformed
- Never tighten the spindle using the barrel, only using the ratchet. This will reduce the chances of overtightening and zero errors
- The value measured from the micrometer is read where the thimble scale aligns with the main scale
- This should always be recorded to 2 decimal places (eg. 1.40 mm not just 1.4 mm)

How to operate a micrometer
Vernier Calipers
- Vernier calipers are another distance measuring tool that uses a sliding vernier scale
- They can also be used to measure diameters and thicknesses, just like the micrometer
- However, they can also measure the length of small objects such as a screw or the depth of a hole
- Vernier calipers generally have a resolution of 0.1 mm, however, some are as small as 0.02 mm - 0.05 mm
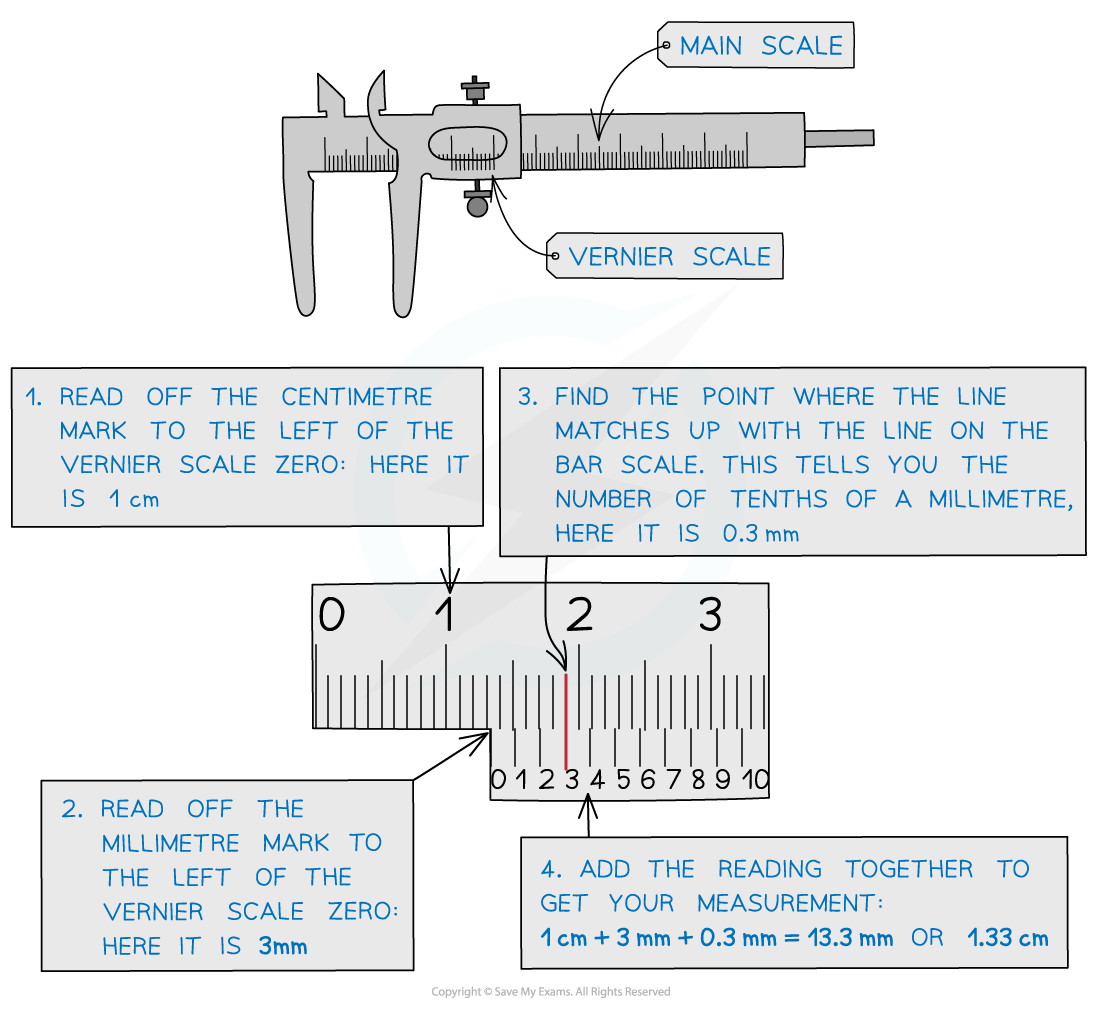
- The calipers are made up of two scales:
- The main scale
- The vernier scale
- The two upper or lower jaws are clamped around the object
- The sliding vernier scale will follow this and can be held in place using the locking screw
- The value measured from the caliper is read when the vernier scale aligns with the main scale
- This should always be recorded to at least 1 decimal place (eg. 12.1 mm not just 12 mm)

The vernier caliper reading is read when the vernier scale aligns with the main scale
转载自savemyexams

早鸟钜惠!翰林2025暑期班课上线

最新发布
© 2025. All Rights Reserved. 沪ICP备2023009024号-1


